We’re going to learn how to make a card on Microsoft Word today. Although Microsoft Word is primarily a word processor, it is capable of much more than just creating documents. It offers a strong collection of graphic tools to assist you in creating visuals for documents such as invitations and greeting cards. How is it possible to accomplish this? In this post, we’ll walk you through creating a card using Microsoft Word.
You can use Microsoft Word to create greeting cards for friends, invites for family members, and other cards for special people, as well as certificates of any kind.
Why do we need to learn how to make a Card on Microsoft Word?
Because the card has been handled by both opponents, cards not only foster an emotional but also a physical link between the sender and the recipient. They can be cherished, clutched, and looked upon. Together with the ideas, the card’s inspired phrases serve as a tangible record that enhances the message. However, the popularity of mailing cards is waning as most people become sidetracked by the hefty implementation costs.
And you no longer need to be concerned about it. This tutorial will teach you how to make a card in Microsoft Word.
You may also like>>> How To Make A Pamphlet On Microsoft Word [2 Methods]
How to Make a Card on Microsoft Word?
Whether you can create a card with Microsoft Word depends on how creative or experienced you are with graphics. You can dominate the opposition if you are skilled at using figures and forms and are knowledgeable about color theory and typography. To make things easier, let me walk you through the process step-by-step in this example so you can see how to make a card in Microsoft Word.
Step 1>
Open Microsoft Word and select a fresh, empty document.

Step 2>
Set the page setup from the layout option as described below before creating a card.

Step 3>
You’ll see a new popup window open. Here, I’m orienting the page to landscape, putting up a very small margin of 0.5, and then selecting the “OK” button.

Step 4>
I’m going to adjust the page color now by selecting the “Design” tab in the navigation bar.

Step 5>
Next, go back to the menu bar’s insert tab, where you can input figures and shapes. Let’s begin with the forms.

Step 6>
Because I’m creating a folding card, I’ll use a square shape to assist me in dividing my page into two sections. I’m creating an 8.25m by 5.22cm rectangle here.

Step 7>
I’ll simply duplicate the first form and move it into place for the second section. Since the shape’s only function was to divide the page into half folds, I’ve erased its outline and filled it in with black.

Step 8>
We have a colorful border because we utilized a colored page, but you can also use page borders. However, I’ll be using a lovely border here that you can download from the internet and use to embellish your card. It’s a flower border. From the insert tab, select the photos option since our border file is an image file.

Step 9>
I’m using the image below as a stylish card, as you can see from the results. It is not necessary to re-insert the photo for additional borders; instead, copy it, rotate it to a 90-degree angle, and align it on the other side.

Step 10>
As you can see in the sample below, I utilized a few other photographs on the second page in a similar manner.

Step 11>
I’m going to use Microsoft Word’s text box the ability to compose something new.

Step 12>
You can change and format text by adjusting its font style, color, and alignment by dragging and dropping the text box into the desired location.

Step 13>
I’ll utilize Microsoft Word’s Word art for heading lines and highlighted text.

Step 14>
You can see the result of how skillfully we can use Microsoft Word’s word art to write text, particularly for cards. Simply type text in Word art, change its font style and color, and save it.

Step 15>
In a similar way, compose the remaining material using the previously mentioned format as needed.

Step 16>
You can also use different colors, such as red, yellow, etc., for any highlighted text. I have provided the contact information and the time of reception.

Step 17>
To finish the space between the pages, return to the first page. I’m going to use the shape that’s shown in the attached image.

Step 18>
As you can see below, after drawing a shape, I adjusted its outline color and set it to the no-fill color to achieve this perfect effect.

Step 19>
Every shape in Microsoft Word has the ability to have text added to it. In a similar way, you can add text to the following shape by right-clicking on it and selecting “Add text” from the drop-down menu.

Step 20>
The greeting card’s title might be expressed in this first line of the card. I’ve included a quote here as well to motivate the opposition.

Why should we leave the text in black when we have colored the shape’s outline? In order to make the text more appealing, I changed its color and design.
Step21>
We’re finished. The invitation is ready for our birthday card. You can also make different greeting cards for that specific someone in the same manner.

You may also like>>> How To Make A Word Cloud In Microsoft Word [2 Best Methods]
Frequently Asked Questions
Is it Possible to Create a Brochure in Microsoft Word Using the Same Process as a Card?
The procedure of creating a card in Word is identical to that of creating a brochure. Both can benefit from the formatting, content addition, and overall design enhancement processes. But unlike a straightforward card design, a brochure needs to take into account other factors including layout, fold lines, and several panels.
Can we use a template to create a card in Microsoft Word?
Microsoft Word contains sufficient capabilities to create a card from scratch or from zero, but it also offers a plethora of pre-made card templates if you’re pressed for time and need to create a card quickly. These templates are available to you by completing these instructions.
Step 1>
Upon opening Microsoft Word, navigate through the Microsoft Word templates gallery rather than creating a new blank document. then choose a category from the list since I need a template for cards.

Step 2>
There are multiple subcategories of card templates available in Microsoft Word. Whichever one you choose will depend on the kind of card you want to make.

Step 3>
You will be prompted to create your file right away after choosing a template from the collection. Just press the “Create” button.
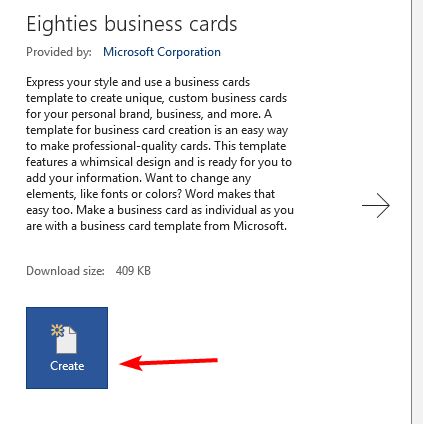
Step 4>
As you can see from the result in the picture below, our card was generated quite quickly—just a few seconds. All you have to do is input the information.

Can we make a card using Microsoft Word and save our template?
By saving your file as a Microsoft Word template, you can create your template in Microsoft Word without a doubt. You might require the same greeting card again in the future after creating it for someone. You can utilize a stored version of your own template in this case.
Can we use Microsoft Word to print a card?
Your card can be printed in Microsoft Word much like other reports and resumes. Not only can you print a card using Microsoft Word, but it also offers a plethora of customization options for printing properties, which might come in rather handy for printing greeting cards.
Is creating a Microsoft Word card the same as creating a resume?
Making a card is not the same as producing a good résumé in Microsoft Word. Although Word provides templates for both, a resume necessitates a more systematic approach that highlights qualifications, work experience, and talents. Making a card, on the other hand, focuses on the visual components and intimate words, allowing for greater flexibility and customization.
Conclusion
All of this has to do with how to make a card on Microsoft Word. Although social media is quickly taking over the world and serving as a means of communication, cards are still the best way to express greetings, feelings, and attachments for any occasion. As a result, I created a post explaining how to use Microsoft Word to create a card. Making the source of interactions between you and your loved ones will hopefully be very beneficial.